Friday, 31 January 2014

on Leave a Comment

Mudbox Stone sculpting Techniques

Hi everyone, Myself Pankaj malik and I would like to instruct you on Stone sculpting techniques. We generally use Mudbox for high resolution details by taking the polygons to next level of realism. In this seminar also we are working on next gen techniques to bring finer details, which we can further cast out in the form of maps for creating intuitive gaming environment.

This technique requires some basic knowledge of Mudbox, let say we can start up with basic cube and continue it to subdivide it. The level where we are satisfied of the details we can start cutting the harder edges and forms by using a scrape brush with tighter fall-off settings.

This scraping process is the key step for doing stone sculpting, since at this stage our blocking process is refined and we can further move to manually tweak the shapes.

After we are done with the scraping tools it’s time to use good quality stencils and stamp to accentuate the detailing in our model. We can use imprint brush to add detail stroke on stone, along with that we can use foamy brush to add more details. The process of sculpting will be continuing till yours artistic decision allows you to settle.

After going through with above process we will be cutting manually the stone to bring more subtlety and versatility, to have game oriented model which we can use with different angles. We can use knife brush to add further details by breaking the continuity of a stone and making it turn into an attached mesh with multiple and smaller stones.

This was all about the sculpting we made in our seminar, will be coming with more concepts and techniques till then good bye.

Thursday, 16 January 2014

on Leave a Comment

Trax Editor

What is Trax Editor?

The Trax Editor is a nonlinear animation tool. You can also manipulate geometry cache clips in Trax. Access your source clips from the Visor, Outliner, or the Library menu in Trax. Play back animation now; your character should stay still. Drag the animation clip from Visor onto the character track in Trax again and put the two clips side by side. If you play back animation now, your character should repeat the same motion twice. There is most likely a noticeable jump between the two clips. Drag the second clip towards the first one so that the two clips overlap. A new track should show up below the first one. When a clip is active, manipulating and keying the objects whose curves are in that clip from the scene view automatically places all those keys in the active clip. Also, all of an active clip’s keys appear in the Time Slider.

What is Camera Sequencer?

Shots in the Camera Sequencer represent the time(s) at which a particular camera is active. They are the tool that lets you manipulate and change the timing of each shot or The Camera Sequencer is a tool that lets you create, re-arrange, and manipulate camera shots of your scene. Each shot defines which camera is active at any particular time, and for how long. You can import audio files for an entire sequence, Import individual audio files to associate with a specific camera shot in Camera Sequencer.
on Leave a Comment

Web Graphics v/s Print Media

Most new designers fail to understand the difference between designing graphics for strict digital use (web graphics) as opposed to designing print media. Web graphics most commonly consist of banners, logos, web templates, icons etc. that will never see the light of day on paper. Print media on the other hand should be designed specifically for high quality printing. Some common items you may design in Photoshop and end up printing are business cards, flyers, advertisements, and letter heads.

DPI / Resolution
Failing to set the correct dots per inch (dpi), commonly known as resolution, before you start working on your design is the most common mistake designers make. When you open up a new canvas (document) in Photoshop by going to File > New, the first window that pops up has a field for resolution, which is usually set by default to 72 pixels/inch. This value is telling us that there will be 72 dots (i.e. pixels) for every square inch of the document. 72 dpi is ideal when viewing graphics on a computer screen, however when you are printing a design out on stock, 72 dots per inch is not enough, and will usually result in your graphic looking blurry and pixilated. As you’ve probably already figured, increasing the dpi will result in a higher quality image. For most printing purposes you will want to set the dpi to 300 pixels/inch to obtain a good quality print.
The downside? That X by Y dimensions image that you just entered into your document that took up say 80% of the canvas, will now only take up say 20% of it. Why? This is because you have set the document to contain more pixels for square inch, as such, that X by Y image is still X by Y in dimensions, but now has a much lower resolution compared to your high resolution document/canvas thus ends occupying only a smaller space.
When you print digital images or share them on onscreen, choosing the right resolution for your output is of paramount importance. Good ol’ 72-ppi images can be forgiving, and you can get many of your large files scrunched down to 72 ppi for Web sites and slide shows.
Printing images is another matter. Among the many different printing output devices, resolution requirements vary. For a starting point, look over the recommended resolutions for various output devices listed in the following table.
In Photoshop Elements 9, you can select the right resolution for an image in the Image Size dialog box. To access the Image Size dialog box, choose Image→Resize→Image Size.
Avoid resampling up (upsampling) or risk image degradation. When you upsample, you set the new resolution to one that’s higher than the original image resolution without making the relative reduction in width and height dimensions.

Output Device
Optimum
Acceptable Resolution
Desktop color inkjet printers
300 ppi
180 ppi
Large-format inkjet printers
150 ppi
120 ppi
Professional photo lab printers
300 ppi
200 ppi
Desktop laser printers (black and white)
170 ppi
100 ppi
Magazine quality — offset press
300 ppi
225 ppi
Screen images (Web, slide shows, video)
72 ppi
72 ppi


Printing basics
Whether you are printing an image to your desktop printer or sending it to a prepress facility, knowing a few basics about printing makes the print job go more smoothly and helps ensure that the finished image appears as intended.
Types of printing
For many Photoshop users, printing a file means sending the image to an inkjet printer. Photoshop can send your image to a variety of devices to be printed directly onto paper or converted to a positive or negative image on film. In the latter case, you can use the film to create a master plate for printing by a mechanical press.
Types of images
The simplest images, such as line art, use only one color in one level of gray. A more complex image, such as a photograph, has varying color tones. This type of image is known as a continuous-tone image.
Color separation
Artwork intended for commercial reproduction and containing more than one color must be printed on separate master plates, one for each color. This process, called color separation, generally calls for the use of cyan, magenta, yellow, and black (CMYK) inks. In Photoshop, you can adjust how the various plates are generated.

Quality of detail
The detail in a printed image depends on image resolution (pixels per inch) and printer resolution (dots per inch). Most PostScript laser printers have a resolution of 600 dpi, while PostScript imagesetters have a resolution of 1200 dpi or higher. Inkjet printers produce a microscopic spray of ink, not actual dots, resulting in an approximate resolution of 300 to 720 dpi.

Wednesday, 8 January 2014

on Leave a Comment

Render Passes

While some people use the terms interchangeably, Rendering in layers is the process of rendering different objects in your scene separately, so that a different image is rendered for each layer of objects. Rendering in passes is the process of rendering different attributes of your scene separately, such as the different pass types below.

A beauty pass (sometimes called diffuse pass or color pass) is the main, full-color rendering of your subject, including diffuse illumination, color, and color maps. A beauty pass usually will not include reflections, highlights, and shadows, which are usually separate passes.
Highlight passes (sometimes called specular passes) isolate the specular highlights from your objects. You can render highlight passes by turning off any ambient light and making the object’s diffuse shading and color mapping to pure black. The result will be a rendering of all the specular highlights in the scene, over a black background, without any other types of shading.

A reflection pass includes reflections of other objects or the surrounding environment, and can either replace or complement the highlight pass. To isolate reflections, usually all you need to do is turn off ambient, diffuse, and specular shading from a surface, so that only reflections appear.

A shadow pass is a rendering that shows the locations of shadows in a scene. A shadow pass often appears as a white shadow region against a black background, a black shadow against a white background, or a rendering with the shadow shape embedded in the alpha channel. Cast shadows are where an object casts a shadow onto another 3D object or darkens an area of a live-action plate. Separate shadow passes can depict attached shadows, where an object casts shadows onto itself, such as the shadow a character's nose casts onto his own face.

A lighting pass is an optional part of multi-pass rendering, that adds flexibility and control to the compositing process. Instead of rendering a beauty pass all at once, you could instead render multiple lighting passes, with each individual lighting pass showing the influence of one light (or one group of lights) on an element. Other lights are hidden or deleted when rendering the lighting pass.

Effects passes may sometimes be rendered, depending on the needs of your project. An effects pass is a separate rendering of a visual effect or a mask for a visual effect. An effects pass might be an optical effect, such as a light glow or lens flare, or a particle effect, such as a cloud of smoke or plume of jet exhaust.

A depth map (also called Z-Depth or a depth pass) is a pass that stores depth information at each point in your scene. Some productions use depth maps rendered in a special depth map file format. Other productions use simulated depth maps which are rendered as standard image files just like any other pass, but with a depth-fading effect over objects with constant white shading.
Passes can be rendered one at a time by rendering differently modified versions of your 3D scene, or some software can set them up automatically or render more than one pass type at once.

Sample Uses For Passes
Here are ten example uses of why scenes are split into different passes in professional work (instead of trying to render the whole scene in one pass as most hobbyists do.)
Memory can be saved by not putting every object into a rendering at once, making complex renderings possible on ordinary PCs.

Changes can be made with little or no re-rendering. Often, just one element (such as a character) needs to be re-rendered, instead of a whole environment. Other adjustments, such as adjusting the darkness of a shadow or the color of a glow, can be made without any re-rendering, just by adjusting your composite.

Integration with live-action plates depends on separate passes. For example, if your character needs to cast a shadow onto the ground in a photograph, or appear reflected in a real pool of water.

Still Images can sometimes be used for some elements, especially if the camera isn't moving. For example, one still frame of a room might be composited behind every frame of a separately rendered animated character.

Recycling is often possible, where a separate element can be reused in different positions or times within a shot.

Reflections can be softly blurred in the composite, which eliminates the need for anti-aliasing or high-quality rendering for the reflection pass.

Particles can be used to create different effects in compositing. For example, if you wanted a natural refraction or heat-ripple effect from your particles, you could render them as a separate effects pass, then use the rendered particles as a mask for a glass distortion filter or warping of the background plate behind them.

Bump mapping can be applied selectively to reflections, beauty pass, or highlight pass, instead of having the same bump map on each element of the shader.

Glows can be created and manipulated in post by adding a blurred copy of your specular pass on top of the composite.


Depth of Field effects can be created without requiring any extra rendering time, by blurring separately rendered background layers, or by using a depth pass as a mask for a blur filter. You can also create atmospheric perspective (fading to blue or gray with distance) with a color correction masked by the depth pass.
on Leave a Comment

TopoGun

TopoGun is a stand-alone resurfacing, and maps baking application. In today's 3D graphics, high quality 3D models, due to their nature, usually have millions of polygons. This is because most of today's 3D models are created from real world scanned models, or they are digital sculptures, created using brush based 3D sculpting applications.
A lot of artists nowadays create their concepts as 3D models, using brush based sculpting applications. They usually start from basic primitive objects, such as cubes. At a certain point, they need to rework the topology of their models.
The resurfacing functions in TopoGun will help you modify and/or recreate the edgeflow of your digital 3D models. The maps baking functions will help you bake various types of texture maps from your high resolution 3D models and then allow you to apply them to your newly created optimized meshes. These texture maps contain information that will help you recover the appearance and features of the original high resolution mesh.

Headus UVLayout
UVLayout is a stand-alone application for the creation and editing of UV texture coordinates for 3D polymeshes and subdivision surfaces.

Some major features of UVLayout are:
OBJ import and export
Edge-loop Detection for quicker UV seam selection
Symmetry Editing for faster flattening of symmetrical meshes
Color Feedback for instant evaluation of distortion errors
Edge Straightening on shell boundaries and interiors
Flattening Brushes for local tweaks of the automatically generated UVs
Auto Packing of UV shells to minimize wasted texture space
Auto Stacking of similar shells for shared texture space usage
Subdivision Surface calculations based on limit surface shape
Unlimited Undo of all editing functions
Plug-in Interface for integration into other applications

Used by professionals in the games and visual effects industries, by hobbyists of all types and by students, UVLayout's unique approach gives texture artists the tools they need to produce high quality low distortion UVs in significantly less time than they would by traditional methods.

This is where we'll post general background information and news for everyone to see, plus links to the user guides, training videos and the latest software installs for registered support customers. 
on Leave a Comment

Autodesk Examination

Maac Preet vihar provides its student a cutting edge opportunity to with stand with highly competitive C.G Industry by opening the gates of getting a professional certified person of “Autodesk”. The Autodesk certification program is highly recommended for C.G aspirants who want a unique place in this industry, off course with benchmark certified education of leading industry software’s like Maya and 3DS Max is always a worth.
MAAC Preet Vihar is serving C.G education to society since 2003; it’s a matter of honor for us to be an only available institute, where an individual can go through with such exams.
Our talented students are trained to be certified for the next level of promotion in their career endeavors.
We provide four certifications mainly Maya certified Associate.
Maya Certified Professional, Max Certified Associate and Max Certified Professional.
The students are provided with valuable classes and preparatory material to fetch best results. The questions are multiple choice questions and based upon the category of exams they have to mark them. The highest marks fetched based upon the different categories are
•    Max Certified Associate:         92 %
•    Max Certified Professional:    89%
•    Maya Certified Associate:      97%
•    Maya Certified Professional:  93%
We are still aiming high to raise the bar even to the next level of competency.
Give you a promotion. Become Autodesk certified from MAAC Preet Vihar.
on Leave a Comment

Adobe Examination

Adobe Examination
As MAAC Preet vihar is ADOBE Certified Centre. Become an Adobe Certified. Adobe certification is an industry standard of excellence, and it’s the absolute best way to communicate your proficiency in leading products from Adobe. An Adobe certified Associate (ACA) is a person who has demonstrated a professional level in proficiency with one or more Adobe softwares products. To become an ACE, you must pass one or more product specific proficiency exams and agree to ACA terms and conditions. Adobe Examination is held on 14th September and 21th September in MAAC Preet Vihar. 
Give you a promotion. Become Adobe certified from MAAC Preet Vihar.


on Leave a Comment

Annual Day

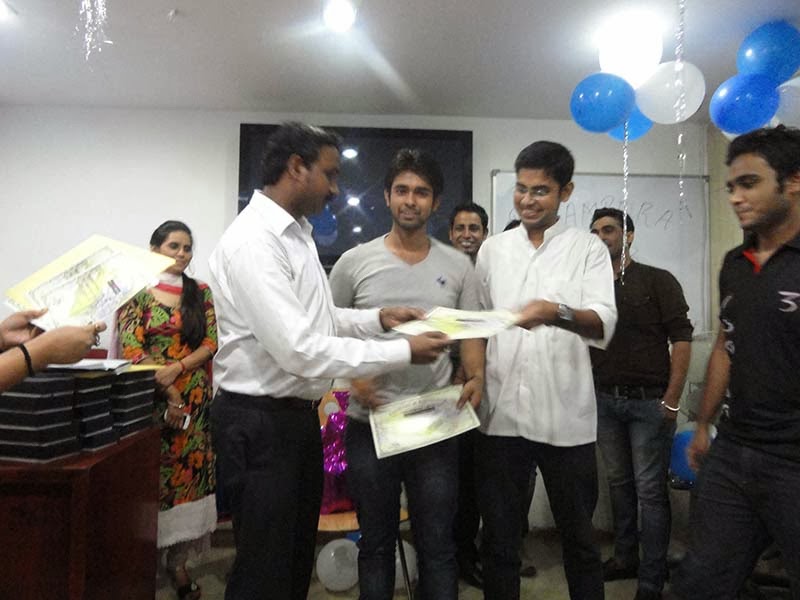
Maac Preet vihar organizes A carnival of Animation, VFX & short films, Held on 13-Sept-2013. A wonderful platform for the students where they demonstrated their talent to the mass audience by submitting show reels. This year almost 100 students had participated in the carnival. In this carnival 15 movies participated and out of 15 movies 3 movies got selected in different category and awarded as 3rd runner up, 2nd runner up and 1st prize.
In VFX 3rd Runner up is COCKROCH, 2nd runner up is JINNIE and winner is MAAC ADD.
In Documentary 2nd runner is NARI and Winner is CIGRATTE
In Short Films 2nd runner up is VRIDH and winner is GUMRAH


Thursday, 2 January 2014

on Leave a Comment

Acting For Animation (PARESH PAREKH)

Last week we had some excited session for our students like we arrange knowledge gaining sessions and seminars for the up gradations and better qualifications to provide student with cutting edge quality knowledge and skills to beat the competition. We have a detail planed out activity for our students where we share our Research and Developments with students. This activity is initiated by MAAC PREET VIHAR. These sessions are highly recommended technical activities which draws attention not only for students but for a seasoned artist also as these include topics which are advance and not the part of our regular course so students got opportunities to experience the industry standards. We have conducted a two days session of Acting for animation by paresh parekh He has had acting stints in numerous television serials. Paresh then went on to work as Chief Assistant Director to Ketan Mehta and has been the casting director for some major Bollywood films like Mangal Pandey – The Rising, Rang De Basanti, Naina and the upcoming project Colour of Passion based on the life of Raja Ravi Verma, the painter. He has trained numerous Film & TV actors like Neil Nitin Mukesh, Minisha Lamba, Imraan khan, Vidya Malawde, Shahnaaz Treasurywala etc. For the last 6 years, Paresh has been training Animation students. Now he is responsible for incorporating acting skills in animation training and the process of film-making.


on Leave a Comment

Diwali Celebration In MAAC Preet Vihar

Wishing you all a very Happy Diwali

Diwali is one of the most important festival of India. It is the festival of lights; it is celebrated in all parts of our country. A few days before Diwali, people clean their houses and shops and get them whitewashed. On Diwali day, people decorate their houses. On the night of Diwali, lamps are lit in every village, town and city. All the houses, shops and buildings are illuminated with earthen lamps, candles and electric bulbs. Children move about in their best clothes. People exchange sweets and gifts. Children spend money in buying sweets, toys and crackers. At night people worship 'Laxmi', the goddess of wealth. Diwali is a festival of joy. On this day everyone is happy.

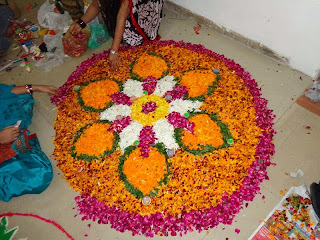
On this special occasion MAAC Preet vihar organized Rangoli and Diya compition. More than 100 students had participated in this competition and awarded as 3rd runner up, 2nd runner up and 1st prize. 


Powered by Blogger.